

 Anyone who has picked up a gardening magazine lately has seen that the latest gardening rage is pollinator gardens. You probably know that you do not have to have a garden spot to help support our native pollinators and the moth and butterfly population while here or migrating. All you need is a pot suitable for one or multiple plants and to choose from a large palette of annual and perennial plants. Plan flowers to coincide with insects you hope to support.
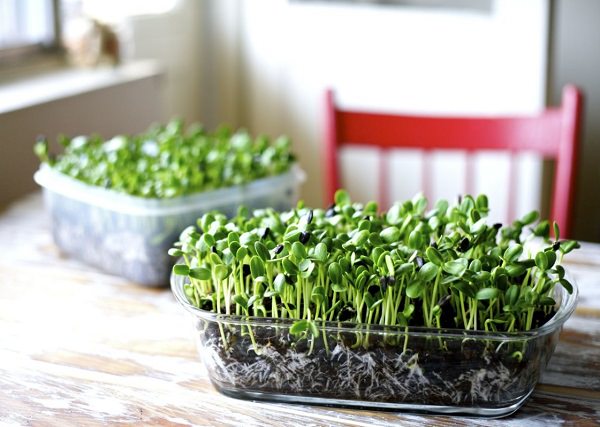
Another trend is to grow food, but not everyone has garden space or a lot of time to devote to a vegetable garden. You might want to consider growing microgreens in deep flats, pots, bags, or window boxes. “Microgreen” is not a term for one type of green. Any of a number of greens can be grown. It simply means that greens are only grown to a size where you clip them for fresh use in small quantities. Most microgreens are harvested when they are just 1-3 inches tall, or a couple of weeks old.
Plants that are used as microgreens include arugula, miner’s lettuce, kale, collards, mustard, beets, broccoli, cauliflower, cabbage, chia, sunflowers, chives, chard, herbs and others. Use your imagination! Until you get familiar with the growth rates of each type you may choose to stick with seed mixes labeled as microgreens, as they are chosen to grow at similar rates and not crowd each other out.
Once you get the knack of it you can start making your own combos with plants of similar growth habits, or grow them separately and mix as you harvest. Herbs, in particular, would probably be best grown separately and mixed upon harvest, or they might overpower the flavor of other greens.
Microgreens can be used as a garnish, ingredient, such as kale in soups, base or topping for salads, or mixed with sprouts and used as toppings or in sandwiches. The bottom line is these little powerhouses are packed with vitamins, minerals, and fiber and are a healthy addition to your diet.
If you are growing them inside, any good potting mix will probably work. If you grow them outside you may find a potting mix, by itself, is too light and will dry out fast. Most garden centers sell packaged garden mixes or soil amendment for outside use. Those can be mixed with your potting mix.
Start out with maybe half potting mix and half garden mix. If that still feels light enough to drain well but is starting to have a little more heft to it, more like garden dirt, then that will probably hold water well enough. You don’t want it too heavy or it will rot plants and not provide the oxygen that roots need to grow quickly.
Scatter seed thinly, following package directions. Some seeds are covered and others are just pressed into the soil. Water well. After the seeds come up, a recycled dish detergent bottle makes a good watering tool that gently waters without disturbing the fragile seedlings. Some hose nozzles have a mist setting and that works well, too.
It is a good idea to stagger your seeding dates, sowing some each week so that you can have a continued harvest. As soon as they get large enough, snip with scissors and enjoy! If you leave a little stubble they will re-sprout and create subsequent harvests. Greens are even tolerant of lower light than most gardens need. Anyone with a little space and a few containers can add healthy greens to their diet! This is fun and a great project for kids.
Barbara Leach